Showing posts with label dinesen. Show all posts

4 May 2015

Finishing the Stairs

To finish the stairs there were a number of elements.  We wanted a glazing balustrade at the top of the stairs, to span the width of the stair return.  Obviously we wanted as clean and simple a look as possible, ideally floating and frameless.  Charlie forwarded me a gorgeous photo example but it came with a £1000 price tag!  No chance, all the money had gone!  But Charlie regrouped and came up tops when he found local firm Aluminox.  Steve of Aluminox recommended his side-fixing frameless channel system.  


Once the channel and glass were installed we clad the exterior in more Dinesen Douglas Fir for a seamless look.  We've also hidden an LED strip to downlight the threshold of the stairs.


I eventually found the time to lye and oil the Dinesen Douglas staircase (see What a beautiful floor).  The lye lightens the floor and prevents the orange colour developing.


As a handrail is a Building Control requirement I quickly had to come up with a design.  


Done!


9 Mar 2015

Kitchen installation

Sustainable Kitchens were ready and waiting to install the kitchen.  Charlie O'B (so identified due to the extraordinary amount of Charlies we have had on this project!) arrived and set to work.  The units had all been made in the workshop but the countertop had to be measured and templated onsite.  Only then would we have the exact dimensions needed to fabricate the stainless steel countertop.


Charlie was supposed to have had the place to himself but with the plumbers and electricians busy with other jobs and trying to squeeze us in where they could, it meant that everyone was on site at once.  It was very noisy and busy and meant that everyone had to do a little more jiggling and juggling to not be other's way.  NOT ideal, but there was a lot of jolly camaraderie.


It took only three days to install the units and then it was immediately covered in board to protect it while all the other trades continued. 

By now we were in the first week of August, and had been planning to move in at the end of this month!!!  Doubts were beginning to seed...  My presence on site was really limited due to the fact that we were full swing in the middle of school summer holidays and site was really not safe to bring the children to visit.


A few weeks later the steel was ready and Joseph came along with Charlie to install.  This was far from a straightforward task.   But Sustainable Kitchens handled it with a cool and professional head.   


Steel, unlike wood, is an unforgiving material.  Wood can be planed and eased to fit like a glove.  I had also asked for an experimental aspect which concerned the edge detailing- normally the steel wraps around the ply base so that you see a metal edge (we have since discovered why, as it hides a multitude of sins).  I had asked for the edge to be exposed so that the steel just looked like another layer in the ply.  I wanted the lighter feel that this would give to the metal countertop. 


This meant that the front edges had align perfectly or be cut/sanded so that they would be.  It also meant that the bonding of the metal to the ply base had to be perfect as the edge would expose any gaps in adhesion.  This aspect would normally be disguised by the wrapped edge.


A bit of head-scratching but Charlie figured it out calmly and with a smile, always up for a challenge with my experimental kitchen design!  The wires you can see in the wall are the for the LED lights which have been recessed into the Dinesen Douglas shelf which wraps around the kitchen.  The moveable island was finished in the workshop and wrapped in the wobble-sanded steel.  It was kept out of the way and delivered the day we moved in. It is so beautiful.  I'll share finished photos soon.

23 Aug 2014

Kitchen progression

The chaps at Sustainable Kitchens have been busy and I popped into their workshop to get some previews!

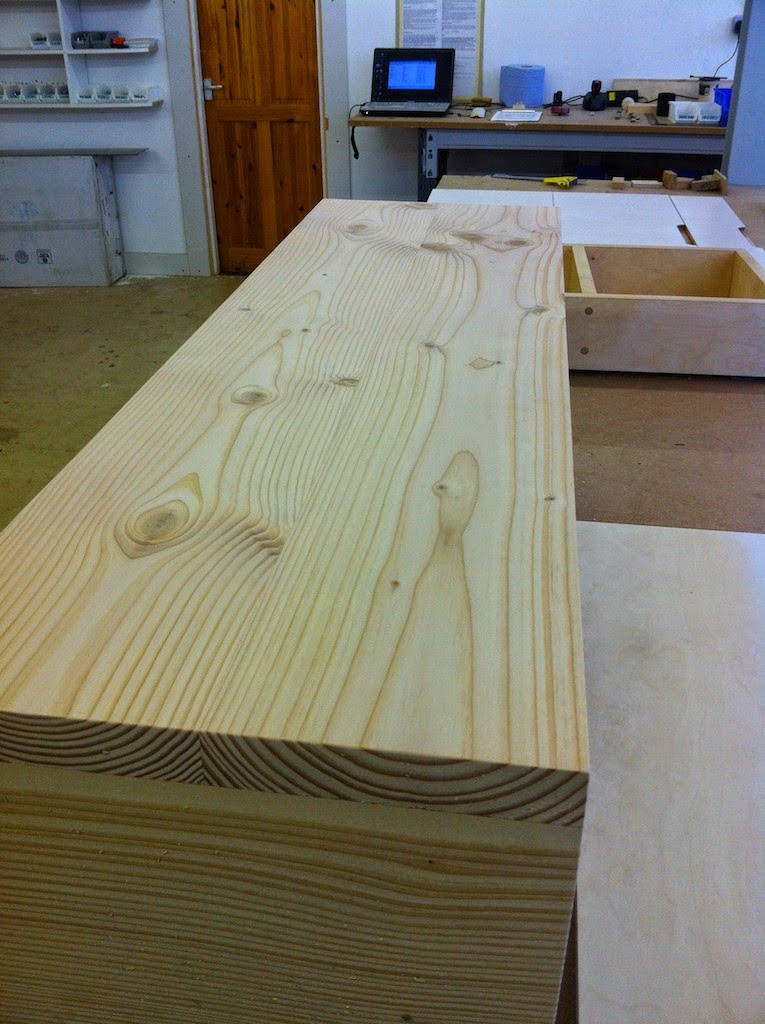
This beautiful Dinesen box is going to house my extractor fan.  It looks amazing!


The carcass is constructed from birch ply and is rock solid.  Even without the fronts it looks fantastic.


I can't tell you how beautiful these drawers are.  They are dovetail jointed at the corners and they feel like they will last forever.


I got to open the box and have a first look at my sink, Kohler Vault Offset Double.  It was chosen over the internet as I couldn't find anywhere locally to look at it in person, but I'm not disappointed. This was one of the first things I chose for the kitchen, and you know what i'm like about sinks and taps!  The decision for the countertop material was one of the last choices.  I was very nervous about having a sink and countertop in the same material, I was worried that the sink would lose it's impact.  Also I prefer inset sinks to under-mounting and I worried about how the edge would look. Below I was looking at how the a wobble-sanded stainless steel finish would look.  This way of finishing the steel has many advantages as it shows less smearing and fingerprints and also allows you to sand out any scratches yourself relatively easily.


And finally my moveable island.  WOW!


3 Aug 2014

The Dinesen arrives!

The day arrived for the Dinesen Douglas delivery from Denmark.  The boards arrived on huge pallets, which would have taken hours to unload by hand.  Ali was quickly sent off to get a tele-lifter to get the crates out of the truck.


We unwrapped them straight off the truck.  So full of character.  Beautiful.


Within an hour and a half of arriving on site the floor was already being laid.  Andrew reported that it was the best floor that he had ever put down.  The planks were perfect and went down very quickly.


We had a four day hiatus before it was sanded in preparation for finishing. 


I had convinced Andrew that he and I would be able to do the finishing ourselves.  He would do the sanding and I would do the applying of products and polishing of the floor.  I had spent hours pouring over the Dinesen post installation booklet and watching the Dinesen videos.  First job was to apply the lye solution.  This lightens the planks and prevents the colour deepening over time.  Using the provided roller, I applied the lye solution and already we were in unknown territory as it didn't behave like in the video.  We were finishing the floor on a hot summer evening, and who knows what difference that made.  The lye was absorbed by the planks very quickly.  I was left wondering whether I should go over it all again...


In the morning we could see that the planks had been lightened by the lye.  The instructions said that we needed to lightly sand the planks before applying the oil.  We were really unsure how much to sand as there was a cloudy white layer on the top of the planks and we could either leave it mostly there or sand a bit more and let the grain come up.  It was our bad luck that the morning we were doing this the Dinesen office was closed for annual holiday (they had been brilliant about talking me through the process the previous week), so we had to just decide for ourselves.  We were applying a white oil next so we were worried that if we left too much pigment on the boards then the floor would be really white and the grain obscured.  


Then came the white oil application, saturating the floor with the oil twice in quick succession and then polishing the excess oil away.


No photos of this part of the job as it was extremely time pressured and busy.  Applying the fluids was simple but we quickly realised that I was not strong enough to operate the floor polishing machine- an enormous brute that had a mind of it's own.  With the oil on the floor it was like a skating rink and even Andrew struggled to control it.  But eventually he wrestled it into submission and I became a builders mate, constantly changing the floor cloths.  If you decide to do a similar thing my tip is buy a LOT of floor cloths.  I bought 50, thinking it would loads more than I would need and I'd be using them for the next 5 years.  I could have got 100. An hour or so later we were admiring the floor.  The grain was now being fully expressed and it was a gorgeously rich colour.  The oil seemed to have dissolved any lye pigment and had brought out the colour of the floor.  In retrospect we wondered whether we should have not sanded as much after the lye coat, but seeing as we have nothing to compare it too we're none the wiser!


After 48 hours we applied the second, single, coat of white oil and that has given the floor a subtly lightened effect.


I love it!  And I loved being involved with finishing it!  It feels like it's ours now and I know it's story.  Things have been incredibly stressful recently (it's money/mortgage related - I haven't been able to write about it as it's been too much like an open wound, there will be a post soon) so this process of getting closer to the final finishes and creating our family home has been so positive and energising.

It really is a beautiful floor!

8 May 2014

What a beautiful floor...

We needed to decide what floor we were going to be putting in our living areas on the upper floor.  It was always going to be a wooden floor so really the next thing was to decide whether to install Engineered or Solid-Wood boards.

I spent a number of weeks of driving all over the place, checking out what was available and what was affordable and in the end we made our choice...

Dinesen, Dinesen, Dinesen!


Dinesen floors have entered my consciousness via the vast amount of magazines I have read over the last few years.  Utterly gorgeous.  Something that I thought was unaffordable and way out of reach. Under Charlie's direction we asked for the catalogue and price list and discovered that if we chose their 'Natural Douglas Fir' product in random length (2-5m), 200mm wide boards, then the price was achievable.  This was wider and longer than most engineered products I was looking at.