Showing posts with label birch ply. Show all posts

4 May 2015

The sliding doors

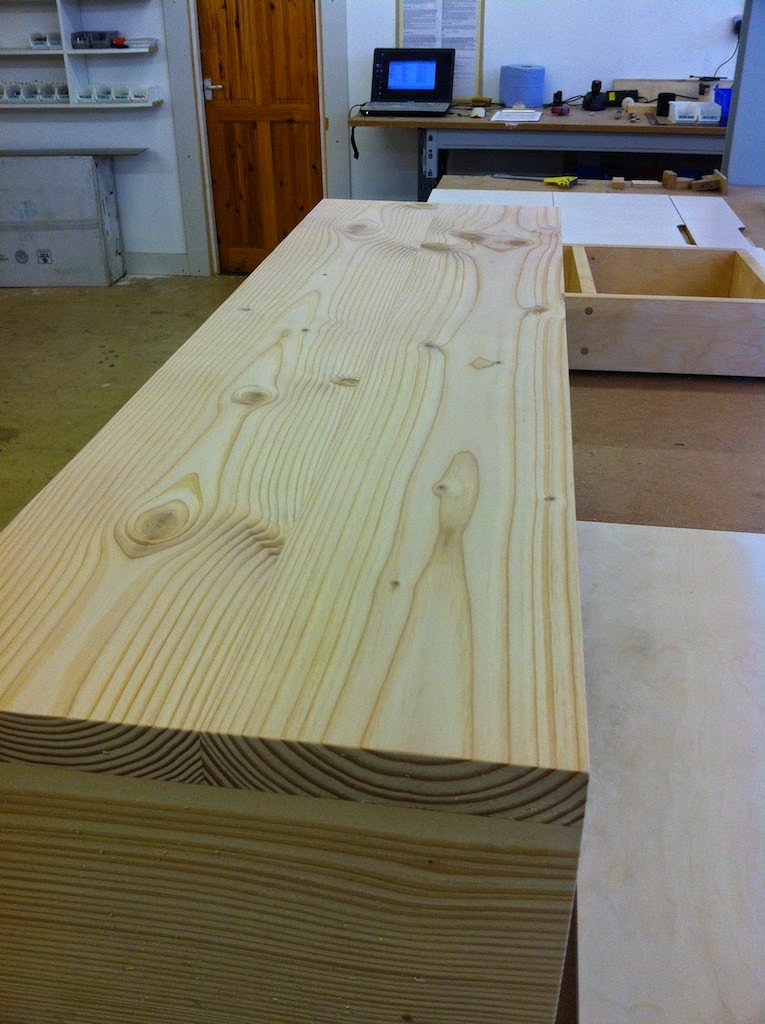
The sliding doors were made in the workshop, like the majority of the birch ply joinery and then transported assembled to site (see Internal joinery)


They are very big and very heavy.


Lovely simple, clean lines.  Unfortunately none of us had taken account of the fact that we had created a finger guillotine.  So retrospective action was taken to make a cut out, so that everyone can keep their all their digits.


2 May 2015

internal joinery

With the decision made to minimise further delays (see The Cowls) it was all about the inside joinery.  We wanted to move in at the end of August so that the children could start the new academic year at their new schools.  Originally I had thought that we wouldn't make it in until later in the year, but impatience got the better of me.  Time to apply the pressure and get everyone moving! 

We had designed the house so that upstairs, our living area, walls are floor to ceiling joinery to provide all the storage a family of 5 needs.  We were using birch ply for everything due to the fact that it is inexpensive and stable.  Charlie had recommended a way of finishing it with a chalk stain and varnish which softened the colour and looked elegant.  

The stairs were installed. Originally we had wanted to have this manufactured for us, this would have saved time on site. In the end Andrew decided that he would make them.  Charlie had designed the staircase to sit within shelving, our library, which was to be constructed like all the other joinery out of birch ply. The treads however are Dinesen, to provide continuity with the flooring.


The treads are open at the top to allow light down into the hallway below.


The LED strip lighting was fitted into shelves with a small projection, it is very beautiful and gentle washes the treads with light.


The gorgeous layers of ply end-grain


To keep all the detailing simple and modern like the shadow gaps (see Render and Plaster ),  Charlie had asked that the window boards not be installed in the normal way, i.e. before the render and plaster which then comes down on top of the board.  This would give a cleaner line, without the window boards projecting into the wall. As Andrew says "sounds simple, but is anything but simple!". 


The Dinesen boards were glued together and cut to size. Being an exact fit, the snugness meant there was a bit of banging and shoving to get them in.  We had some plaster casualties along the way. 


The rhythm of site changed a little during this period as Andrew and Paul stayed in Somerset to produce the large joinery in their workshop and then transported it to site a couple of weeks later.


My Command Centre, a huge piece of joinery.


Office shelving

Downstairs there was less joinery.  There were only a few things that 'needed' doing, the budgets wouldn't allow for 'wish list' items to be done at this stage...


Both bathrooms needed a simple ply box made to allow installation of the sink and toilet.


There is one joinery wall downstairs, the wardrobe in the master bedroom partitions off the en-suite.
 
No slacking please!


23 Aug 2014

Kitchen progression

The chaps at Sustainable Kitchens have been busy and I popped into their workshop to get some previews!

This beautiful Dinesen box is going to house my extractor fan.  It looks amazing!


The carcass is constructed from birch ply and is rock solid.  Even without the fronts it looks fantastic.


I can't tell you how beautiful these drawers are.  They are dovetail jointed at the corners and they feel like they will last forever.


I got to open the box and have a first look at my sink, Kohler Vault Offset Double.  It was chosen over the internet as I couldn't find anywhere locally to look at it in person, but I'm not disappointed. This was one of the first things I chose for the kitchen, and you know what i'm like about sinks and taps!  The decision for the countertop material was one of the last choices.  I was very nervous about having a sink and countertop in the same material, I was worried that the sink would lose it's impact.  Also I prefer inset sinks to under-mounting and I worried about how the edge would look. Below I was looking at how the a wobble-sanded stainless steel finish would look.  This way of finishing the steel has many advantages as it shows less smearing and fingerprints and also allows you to sand out any scratches yourself relatively easily.


And finally my moveable island.  WOW!


5 Jun 2014

A sustainable kitchen!

I really wanted to stay true to the ethos of a sustainable build and try to get a kitchen that would be solidly made from sustainable materials and would last decades.  

As always I was searching high and low to find the solution where I can get outstanding design, excellent function and affordable prices.  A friend highly recommended the company who had built her beautiful kitchen - Sustainable Kitchens who are based in Bristol.  I gave them a call & went to visit their showroom.  I couldn't have asked for a more perfect match.


The showroom is ever so gorgeous, and when you get to touch and feel a kitchen which has been so beautifully crafted you realise that anything else will be a massive compromise.  


Dimitri and I both enjoy cooking, in fact our lives revolve around it.  I had initially decided that with a limited budget I would spend on the appliances and save on the carcass.  However when I started to reflect on this I realised that this wasn't right. Appliances are easier to change and upgrade.  The carcass and cabinets though are a much bigger deal, they are here to stay.   This firm really do care about sustainable principles and put their ideals into action.  I was really excited about the possibility of working together.


Sam, Partner & Designer of Sustainable Kitchens, and I started with their classic Shaker Design- the one I had seen and loved in their showroom.  Sam drew it all up on the computer and sent me visualisation images. It was beautiful, simple and elegant but I just couldn't get that excited feeling. It took me a couple of weeks to realise that I wanted something a bit different.  This was a while ago and I hadn't yet finalised my limited materials palate for the internal finishes.  It was through this process that I realised that I really wanted a birch ply finish throughout the house.  Once the material had been chosen then that influenced the design of the cabinetry a lot.  I was interested in being able to see the edge of the ply and all those layers.


We've been refining, changing, playing with the kitchen design and we finally nearly there!  As it is all bespoke the choices are unlimited.  It has been a really creative and satisfying process.  We've interrogated numerous possibilities at almost every stage -

 Layout. Door design. Door material. Handles. Drawer design. Countertop materials (the biggest issue I reckon!).  Countertop heights.  Plinths.  Upstands.  Upper level cabinets/shelves.  Sinks.  Extractors.  Appliances. Lighting.  Power sockets.  

Sam has been ever so patient, enthusiastic & supportive at every stage.  He has calmly interpreted my random whims of fancy.


You get a sneaky peak of the kitchen in the photo above.  We've designed a moveable island, so we were looking at castors.  

This is so exciting, it's going to be so beautiful!